Simple Car Camper
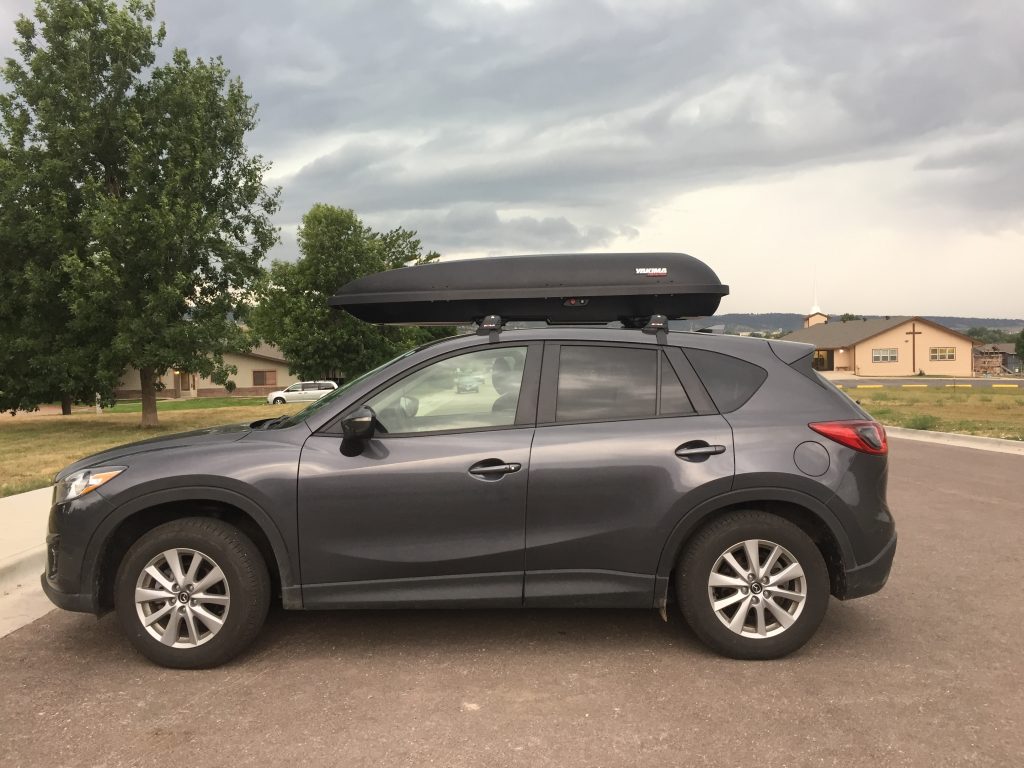
Don’t have a camper van? Don’t let that stop you from taking your long-term road trip! Large converted camper vans are all the rage these days, but you don’t need one for a weekend or long-term climbing trip. Most van owners spend 2-6 months and a few thousand dollars to convert their vans into a mobile home. My husband and I didn’t have that time or expertise before our multi-month road trip, so we spent five evenings after work and about $300 to convert our mighty Mazda CX-5 into a car camper with a roof bin and platform.
- Evening 1: Remove the back seats.
- Evening 2: Install the roof cross bars that we ordered online. Our Mazda is finally a legit outdoor vehicle!
- Evening 3: Buy a Yakima Rocketbox off Craigslist and install it. Grab burgers and beers to celebrate.
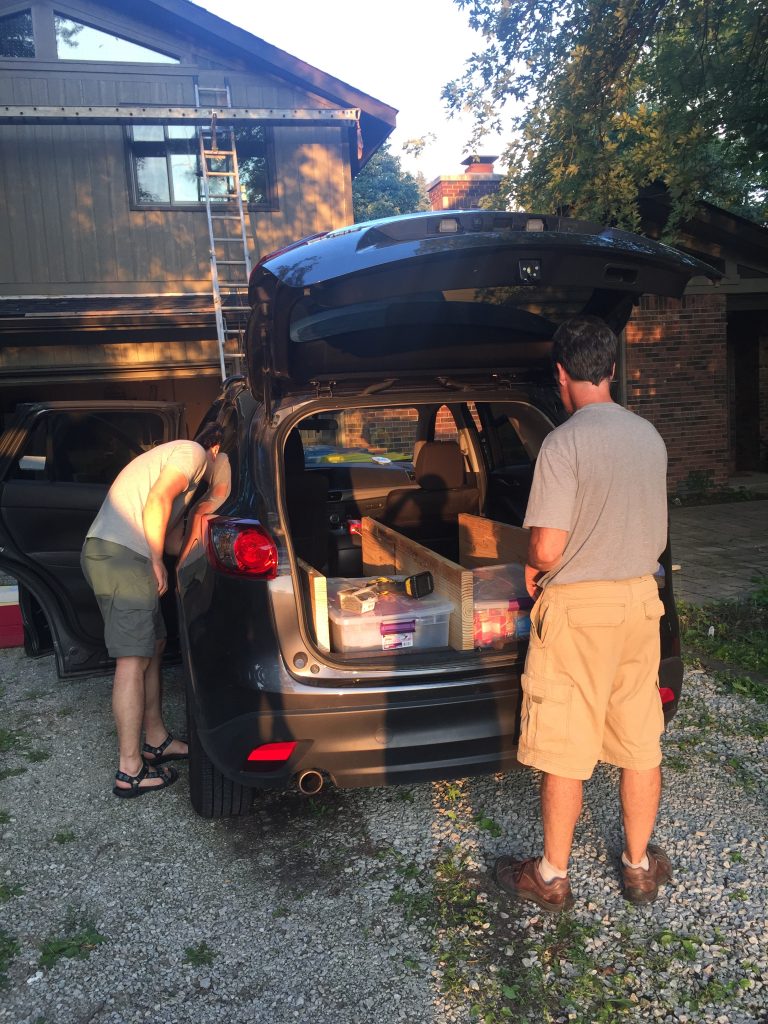
- Evening 4: Snag the large piece of plywood that our neighbor put out on his curb. Borrow his saw to cut the plywood so that it fits in our car.
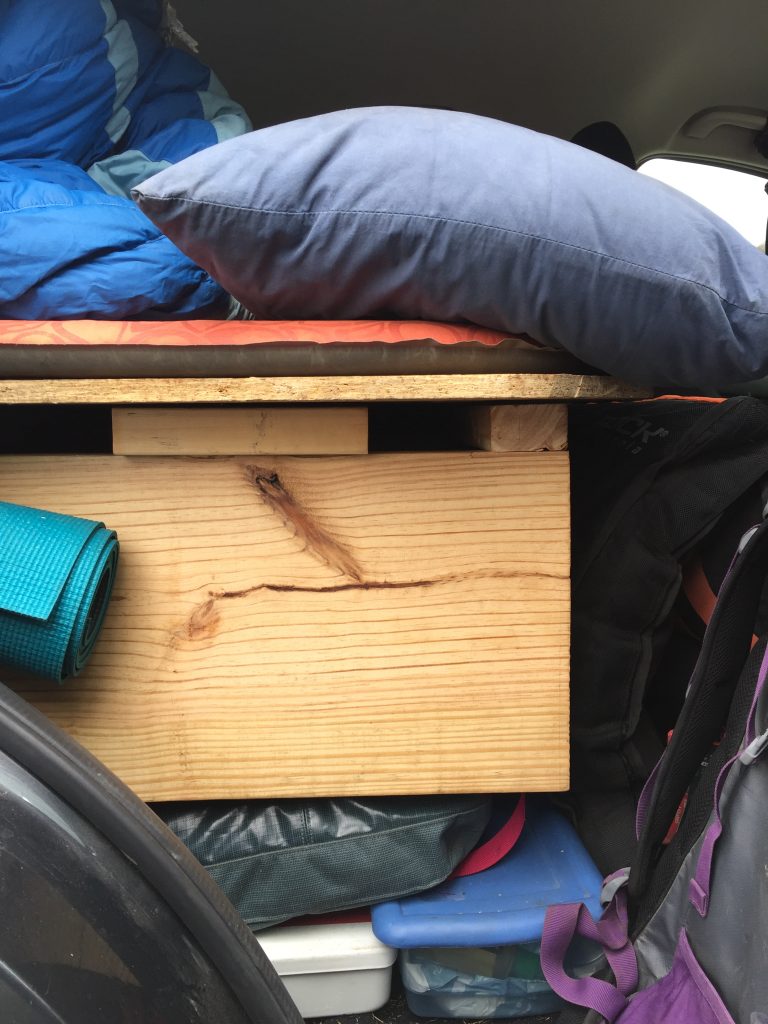
- Evening 5: Borrow our friend’s driveway, saw, and spare pieces of wood to build the car platform. Incorporate large Jenga pieces from our wedding into the platform build-out. Then figure out how everything fits in the car!
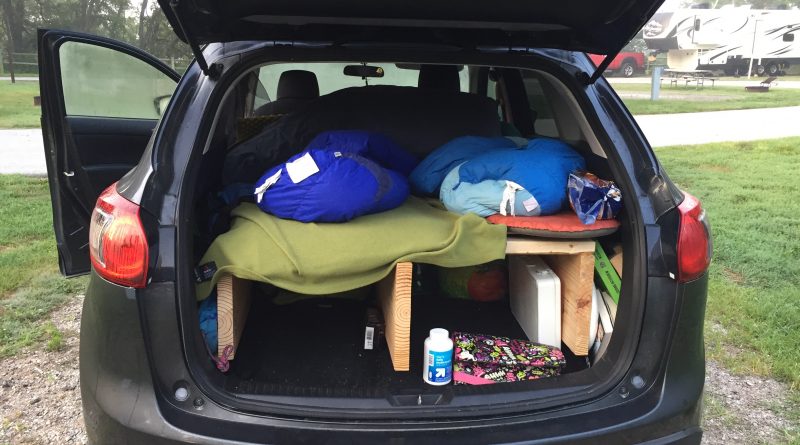
The bed: We sleep on top of the platform on nights that we don’t pitch a tent. We share a large pillow and we each have our own sleeping bag and sleeping pad. The platform is long enough for both of us to sleep straight! It’s quite cozy, and I’ve found convenient places to put my phone, keys, waterbottle, and headlamp at night.
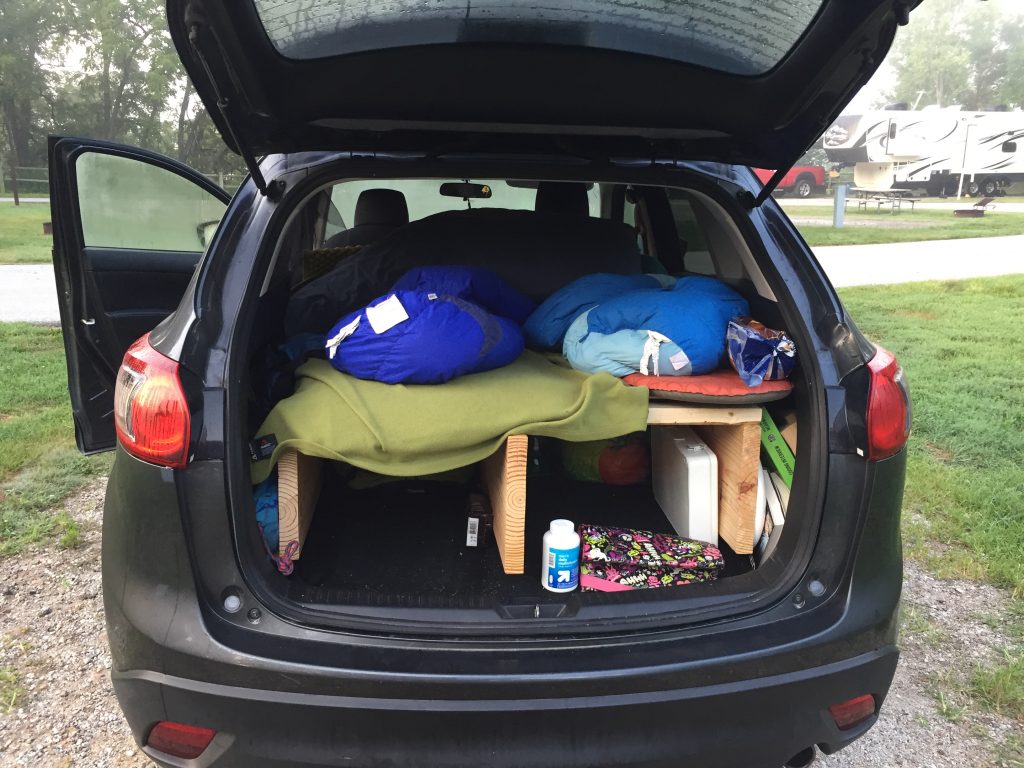
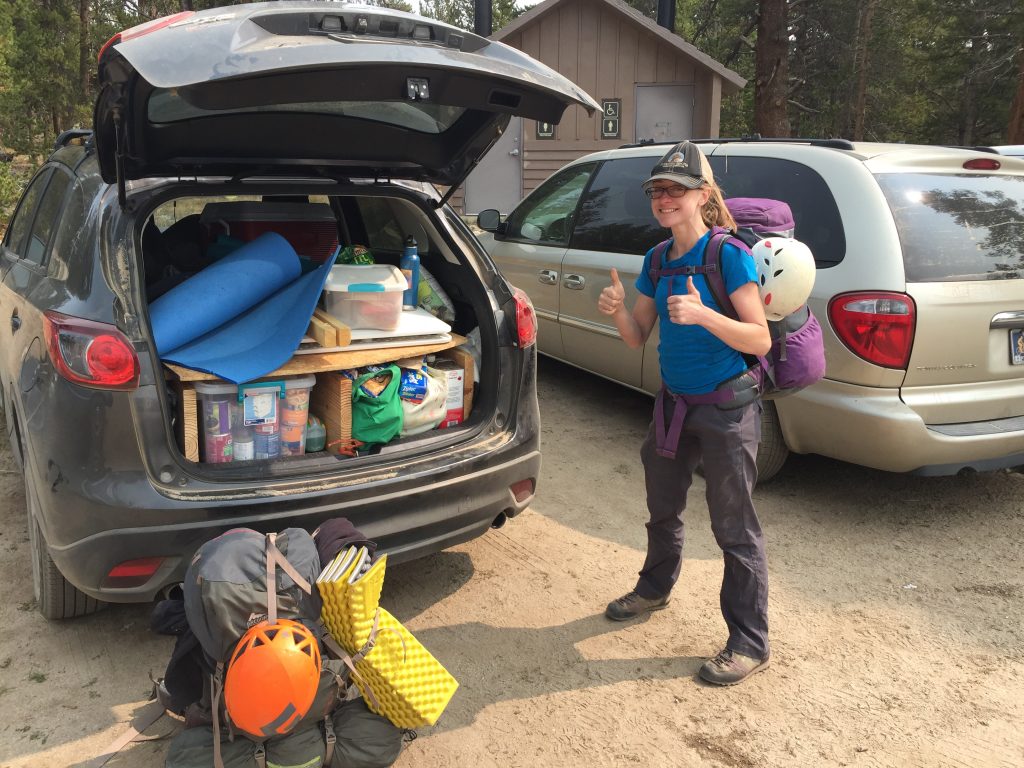
The Pantry: We store our food, water jug, and cookware under the back area of the platform. We also place our coolers and table on top of the platform during the day, and we move them to the front seat at night. The white table, placed on top of the platform, occasionally serves as a counter for making oatmeal or a sandwich.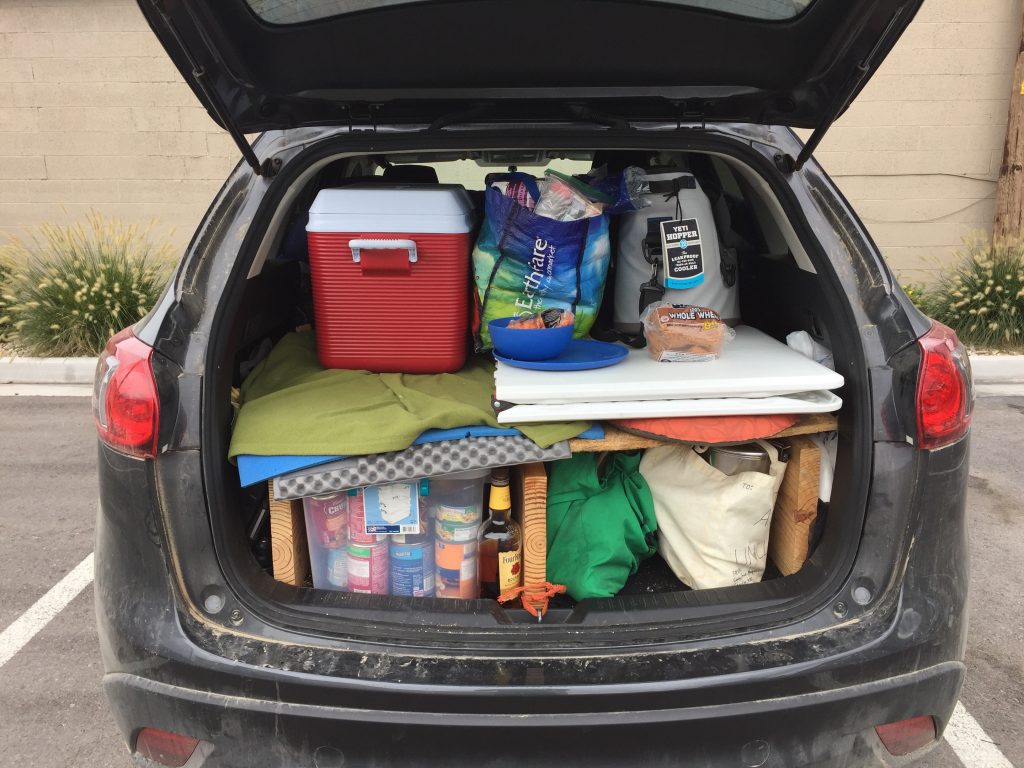
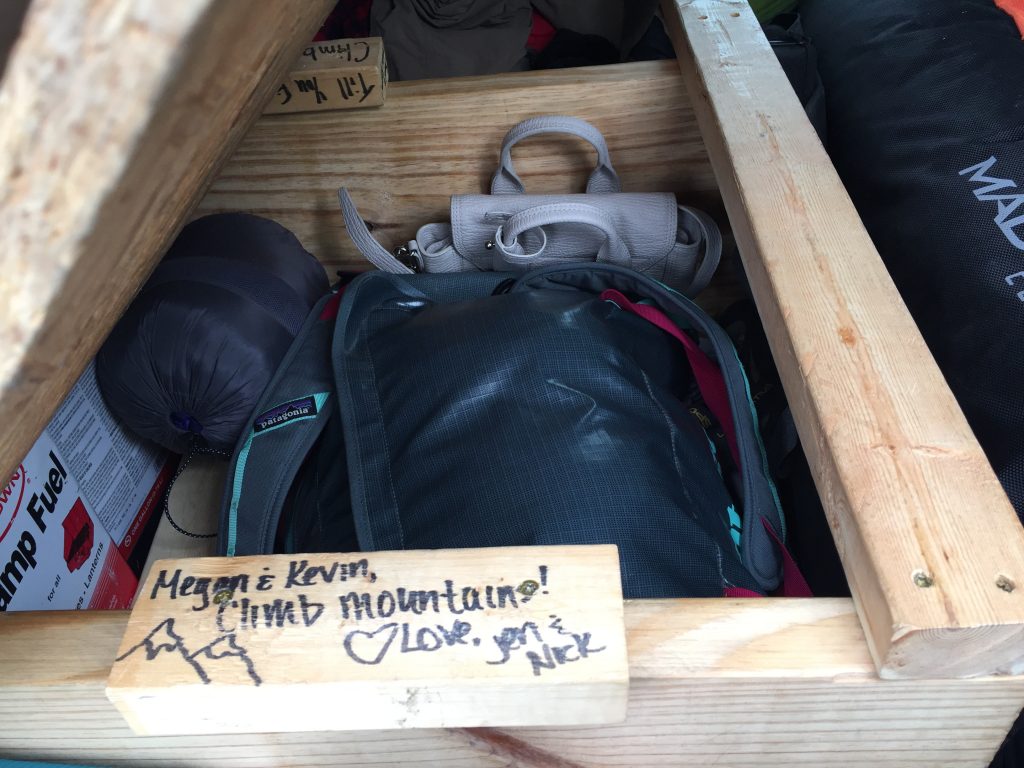
The Closet: We put a hinge in the platform board so that we can raise the front of the board and store our clothes, books, shoes, and toiletries underneath. We both keep our clothes in Patagonia duffel bags. I have the right side of the “closet,” and Kevin has the left side.
The Gear Closet: We place our boulder pad and climbing packs behind the front seats.
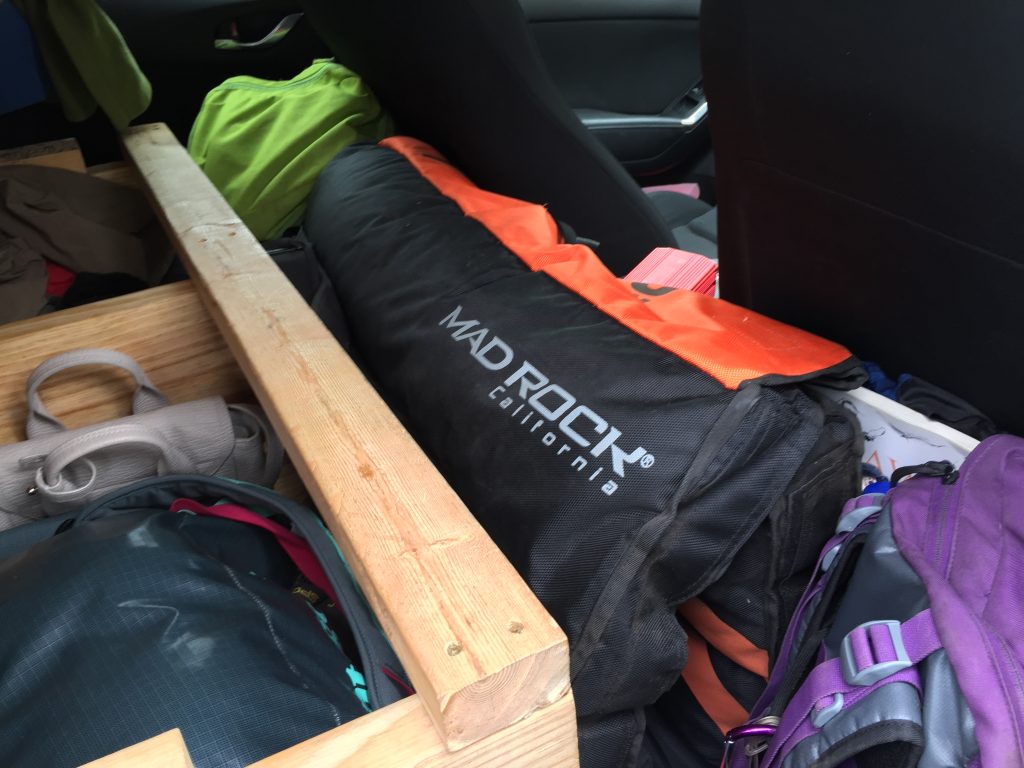
Extra Storage: The sides of the car serve as a catch-all for extra items – yoga mat, laundry soap, extra fuel canisters, etc.
Attic: The roof bin on top of the car serves as the attic for trad gear, backpacking stuff, cold weather coats, etc.
Solar Lighting:
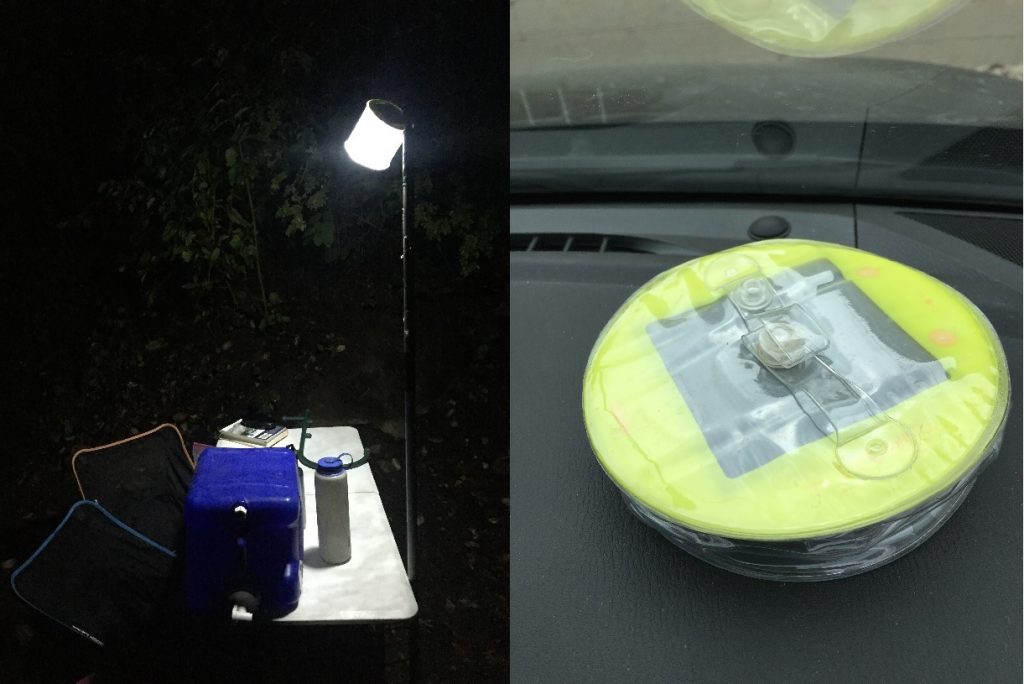
We use our headlamps or the solar-powered Luci lantern for cooking or reading at night. The Luci lantern sits on our dashboard to charge during the day, and it takes 5 seconds to inflate at night.
The Verdict:
We began our trip in August, and we’re still happy with the Mighty Mazda a month and a half later! The platform is surprisingly comfortable, and we have enough room for everything that we need on our trip. We pitch a tent when we plan to stay in a place for a while, but we like the option to sleep in the car for stealth camping or a one-night stay. The hinge near the front of the platform is a key feature, because we can raise the front of the platform to access belongings. We did not screw the top of the platform to the supporting beams – this lets us slide the top back or forward to more easily access items. If we could re-do the platform, we’d use thinner, lighter wood material, but our current setup still does the job well!
Admittedly, I’d take a free fully converted Sprinter van in a heartbeat, but don’t let perfectionism get in the way of a good road trip! If we waited to leave Indiana until we purchased and converted a van, we might never have left. We could get a small camper to tow behind the Mazda, but we currently like the simplicity of just having one vehicle and not having to worry about the camper when we’re looking for parking.
For now, whether it’s a van, RV, sedan, or SUV, the best vehicle is the one that gets you climbing as soon as possible.
